
1. Login to your WordPress.
2. Select the Posts tab on the left side of the screen.
3. Find the article you want to add a video to and click its title OR click "Add New" to create a new article you want to add a video to.
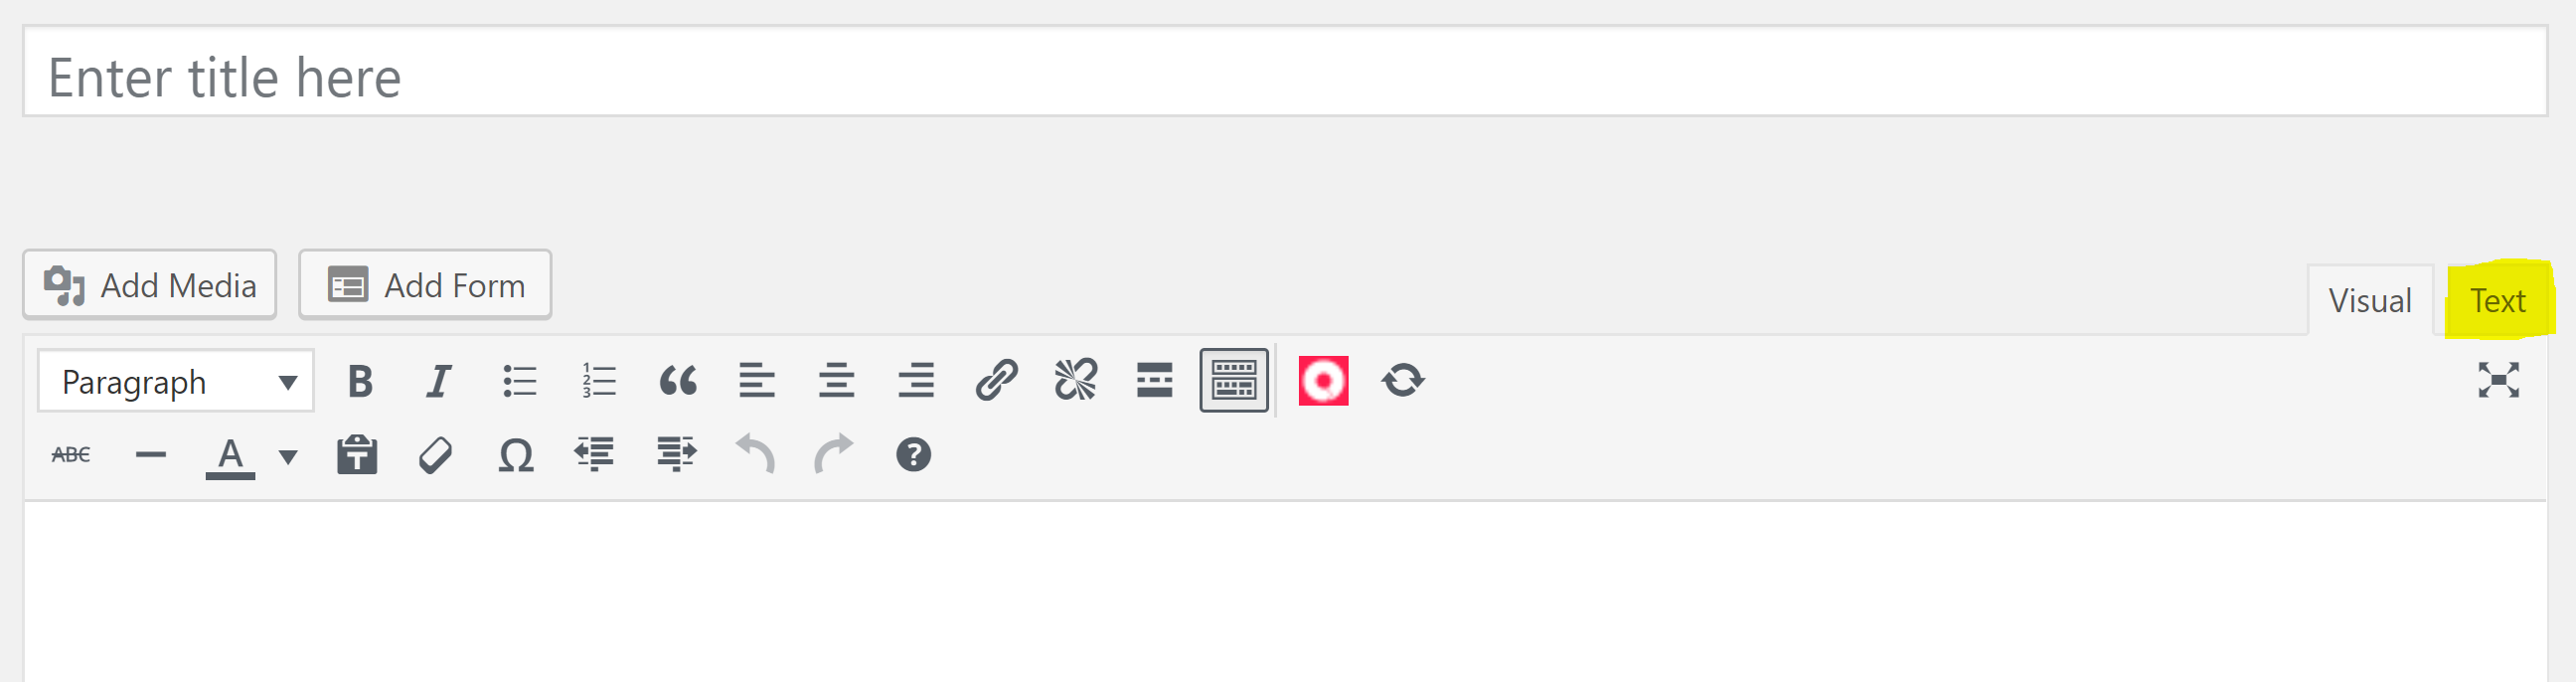
4. Move your cursor in the editor to where you want the video to be, then click on the “Text” tab in the top right corner of the editor.
5. Open a new tab in your browser and find the Vimeo video you want to add to the page.
6. Scroll down to view the information below the video and click “Share.”
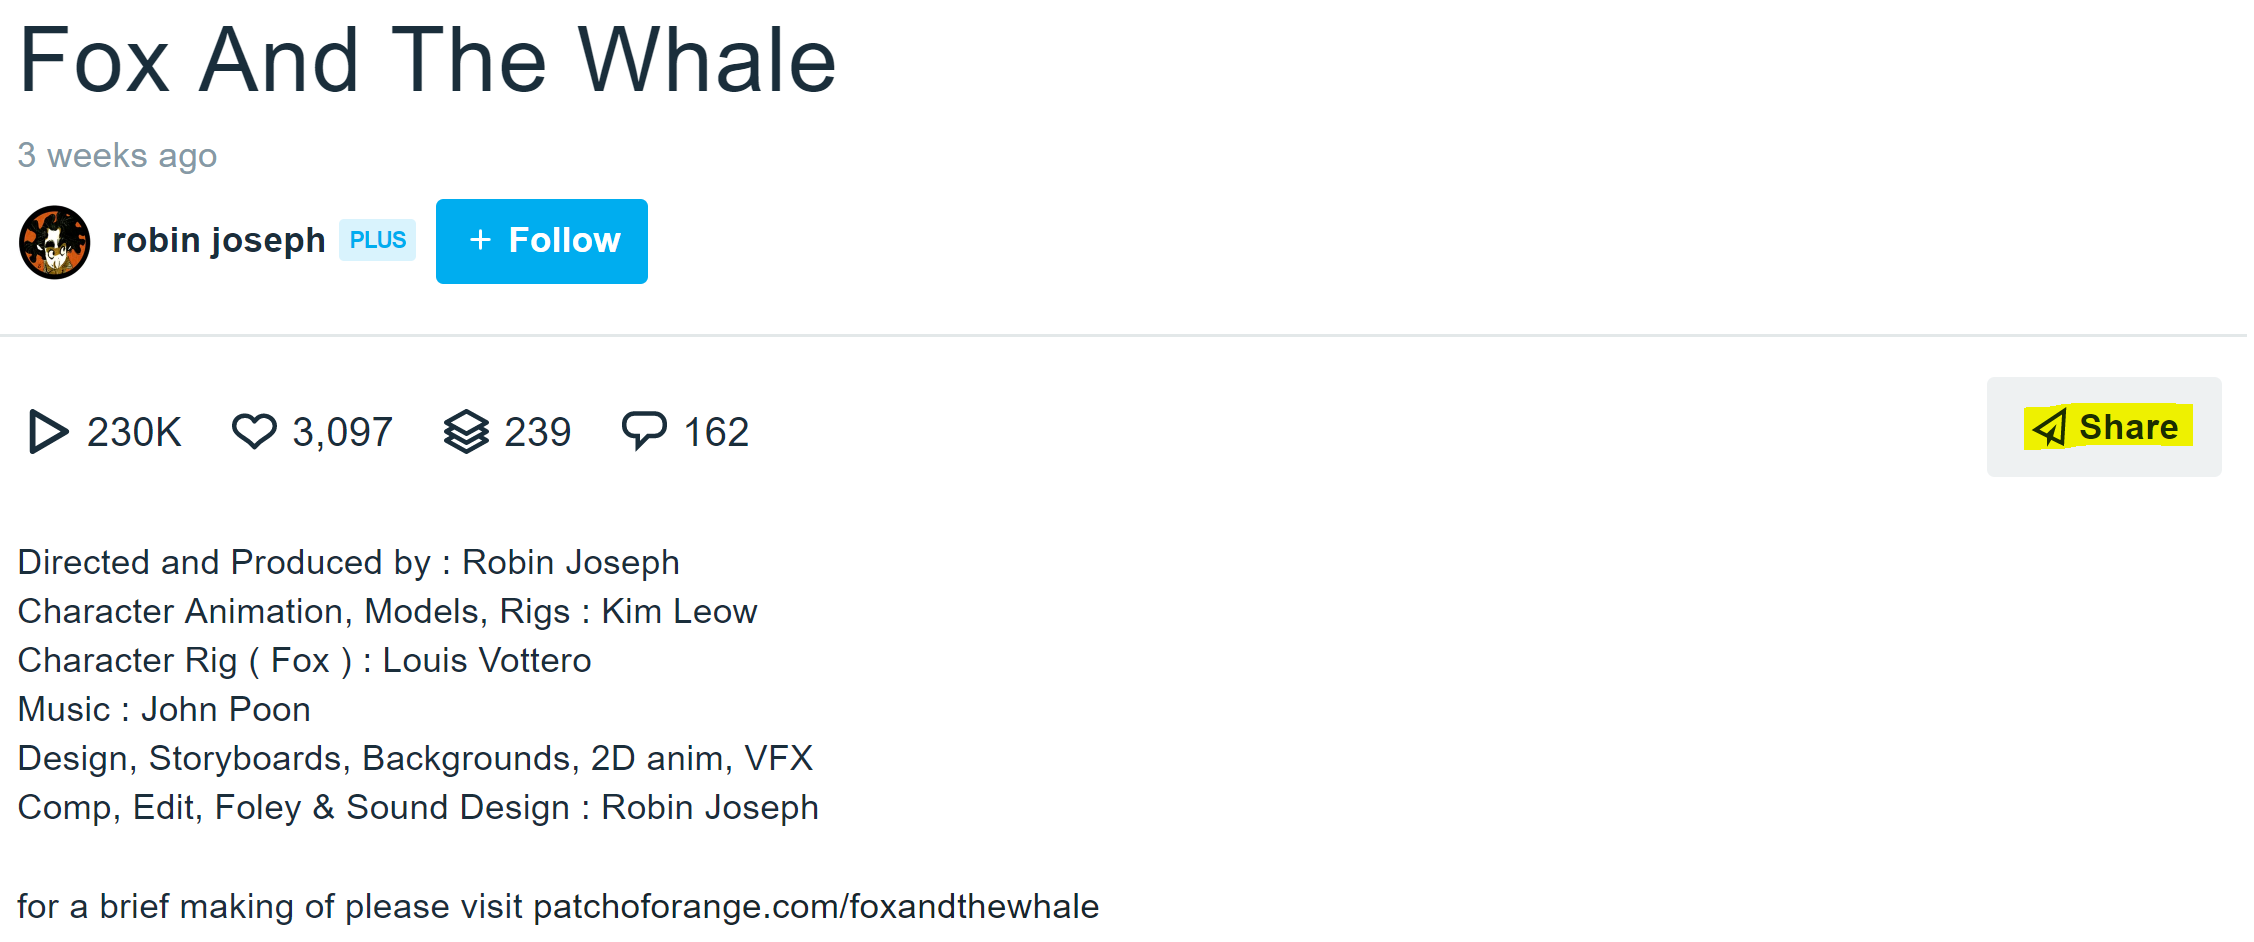
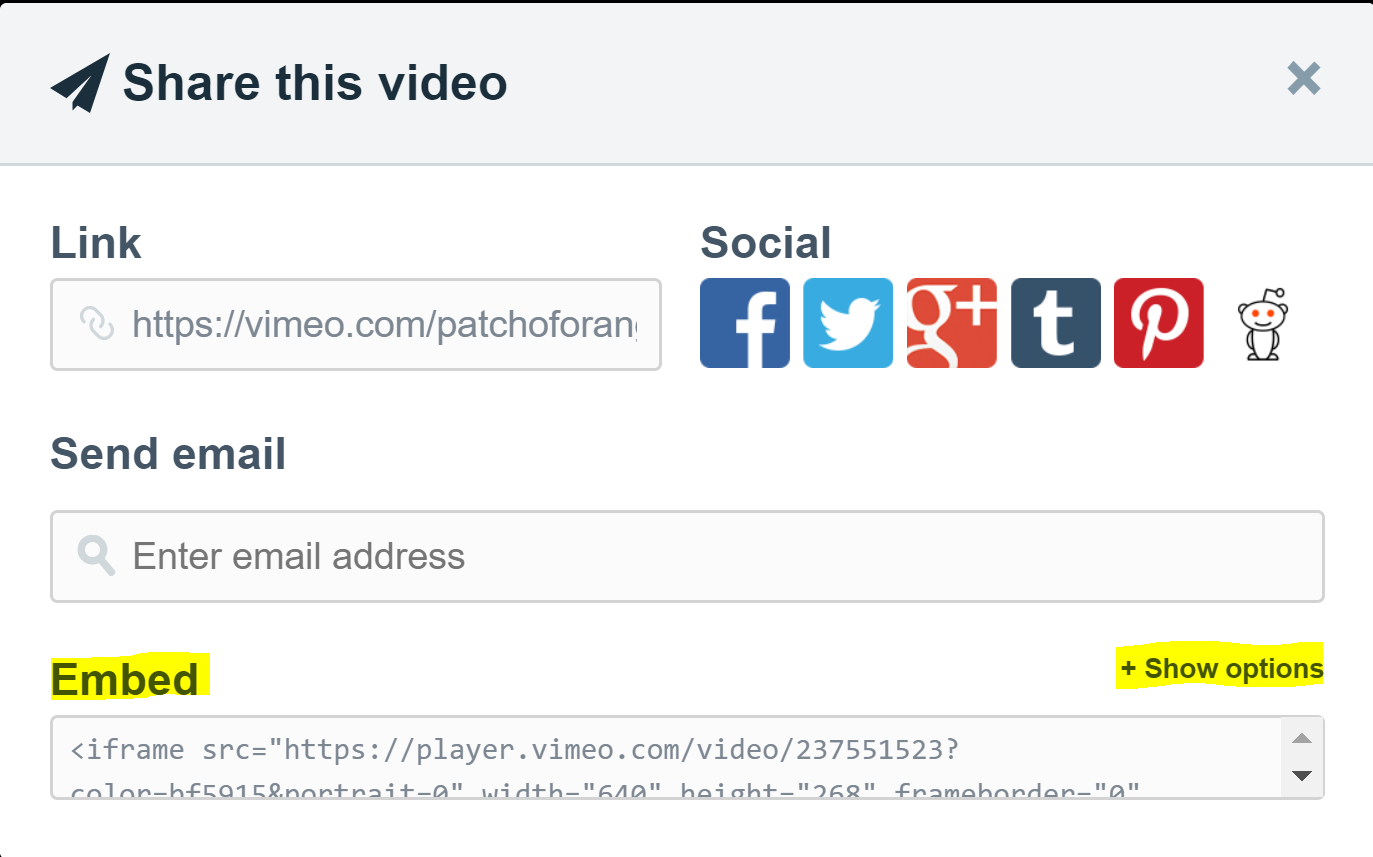
7. After clicking “Share,” a new pop-up window will appear. You can select "Show Options" if you want more control over what the video will look like once added to your site. Once you're ready, select all of the text in the "Embed" box and copy it.
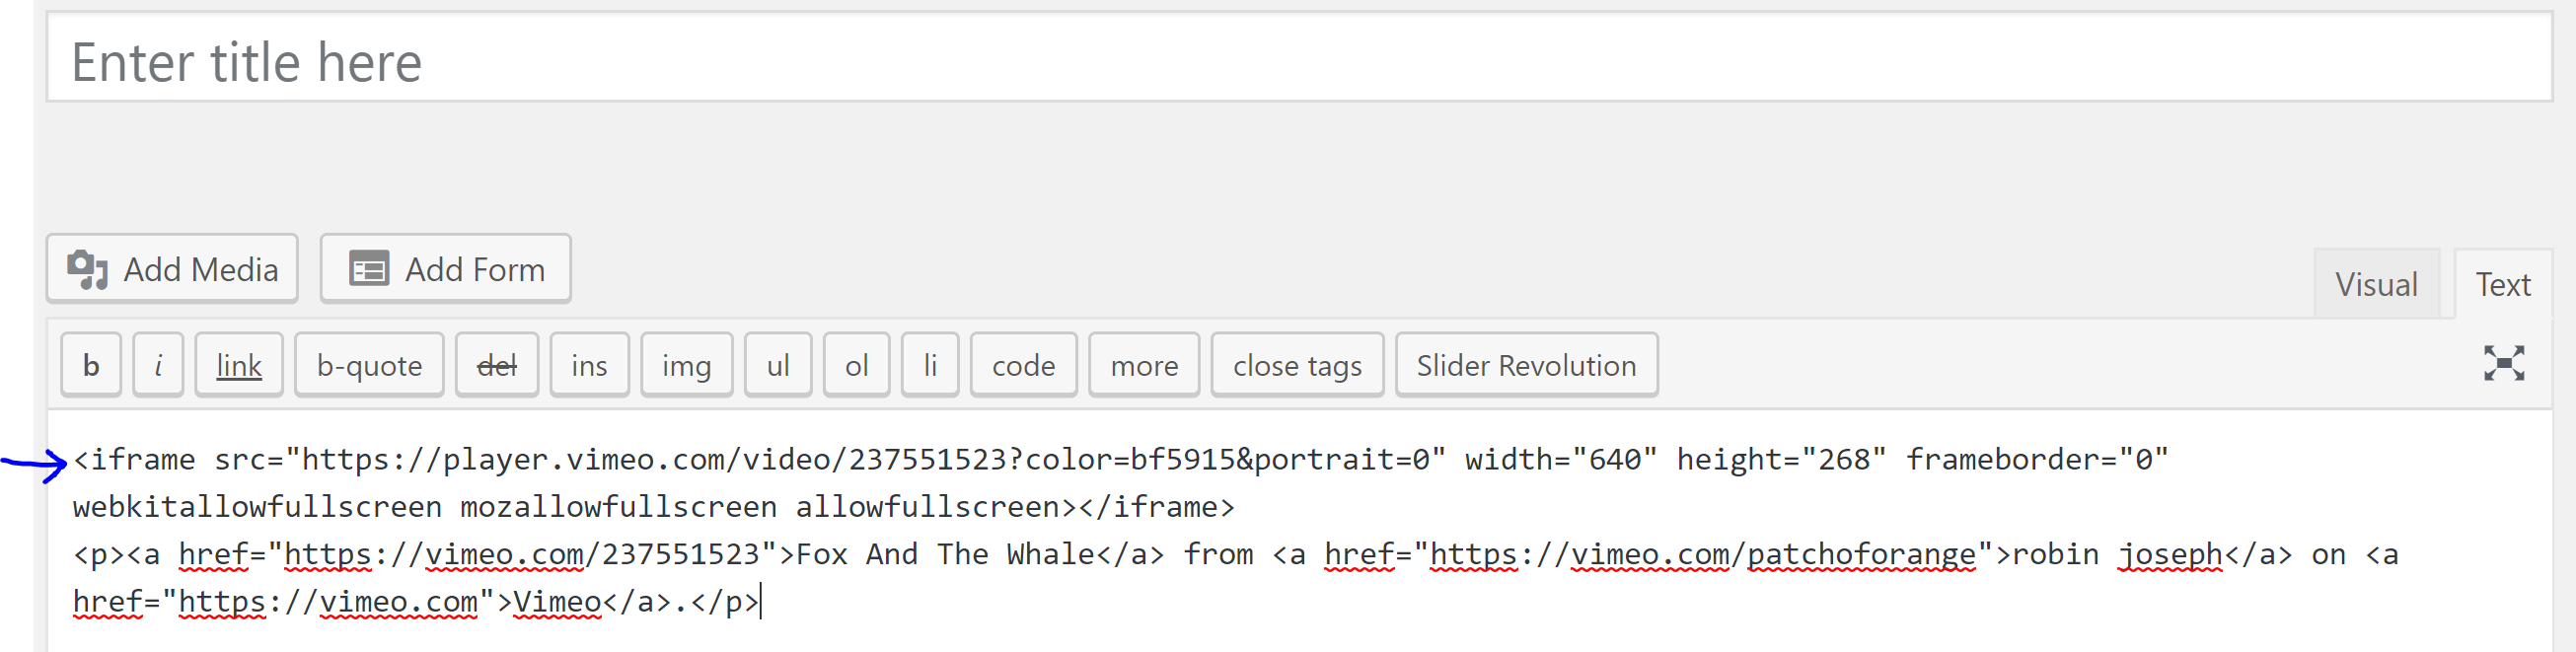
 8. Once you’ve copied the embed code, close the Vimeo share pop-up window and return to the browser tab with the WordPress post editor.
9. Paste the embed code.
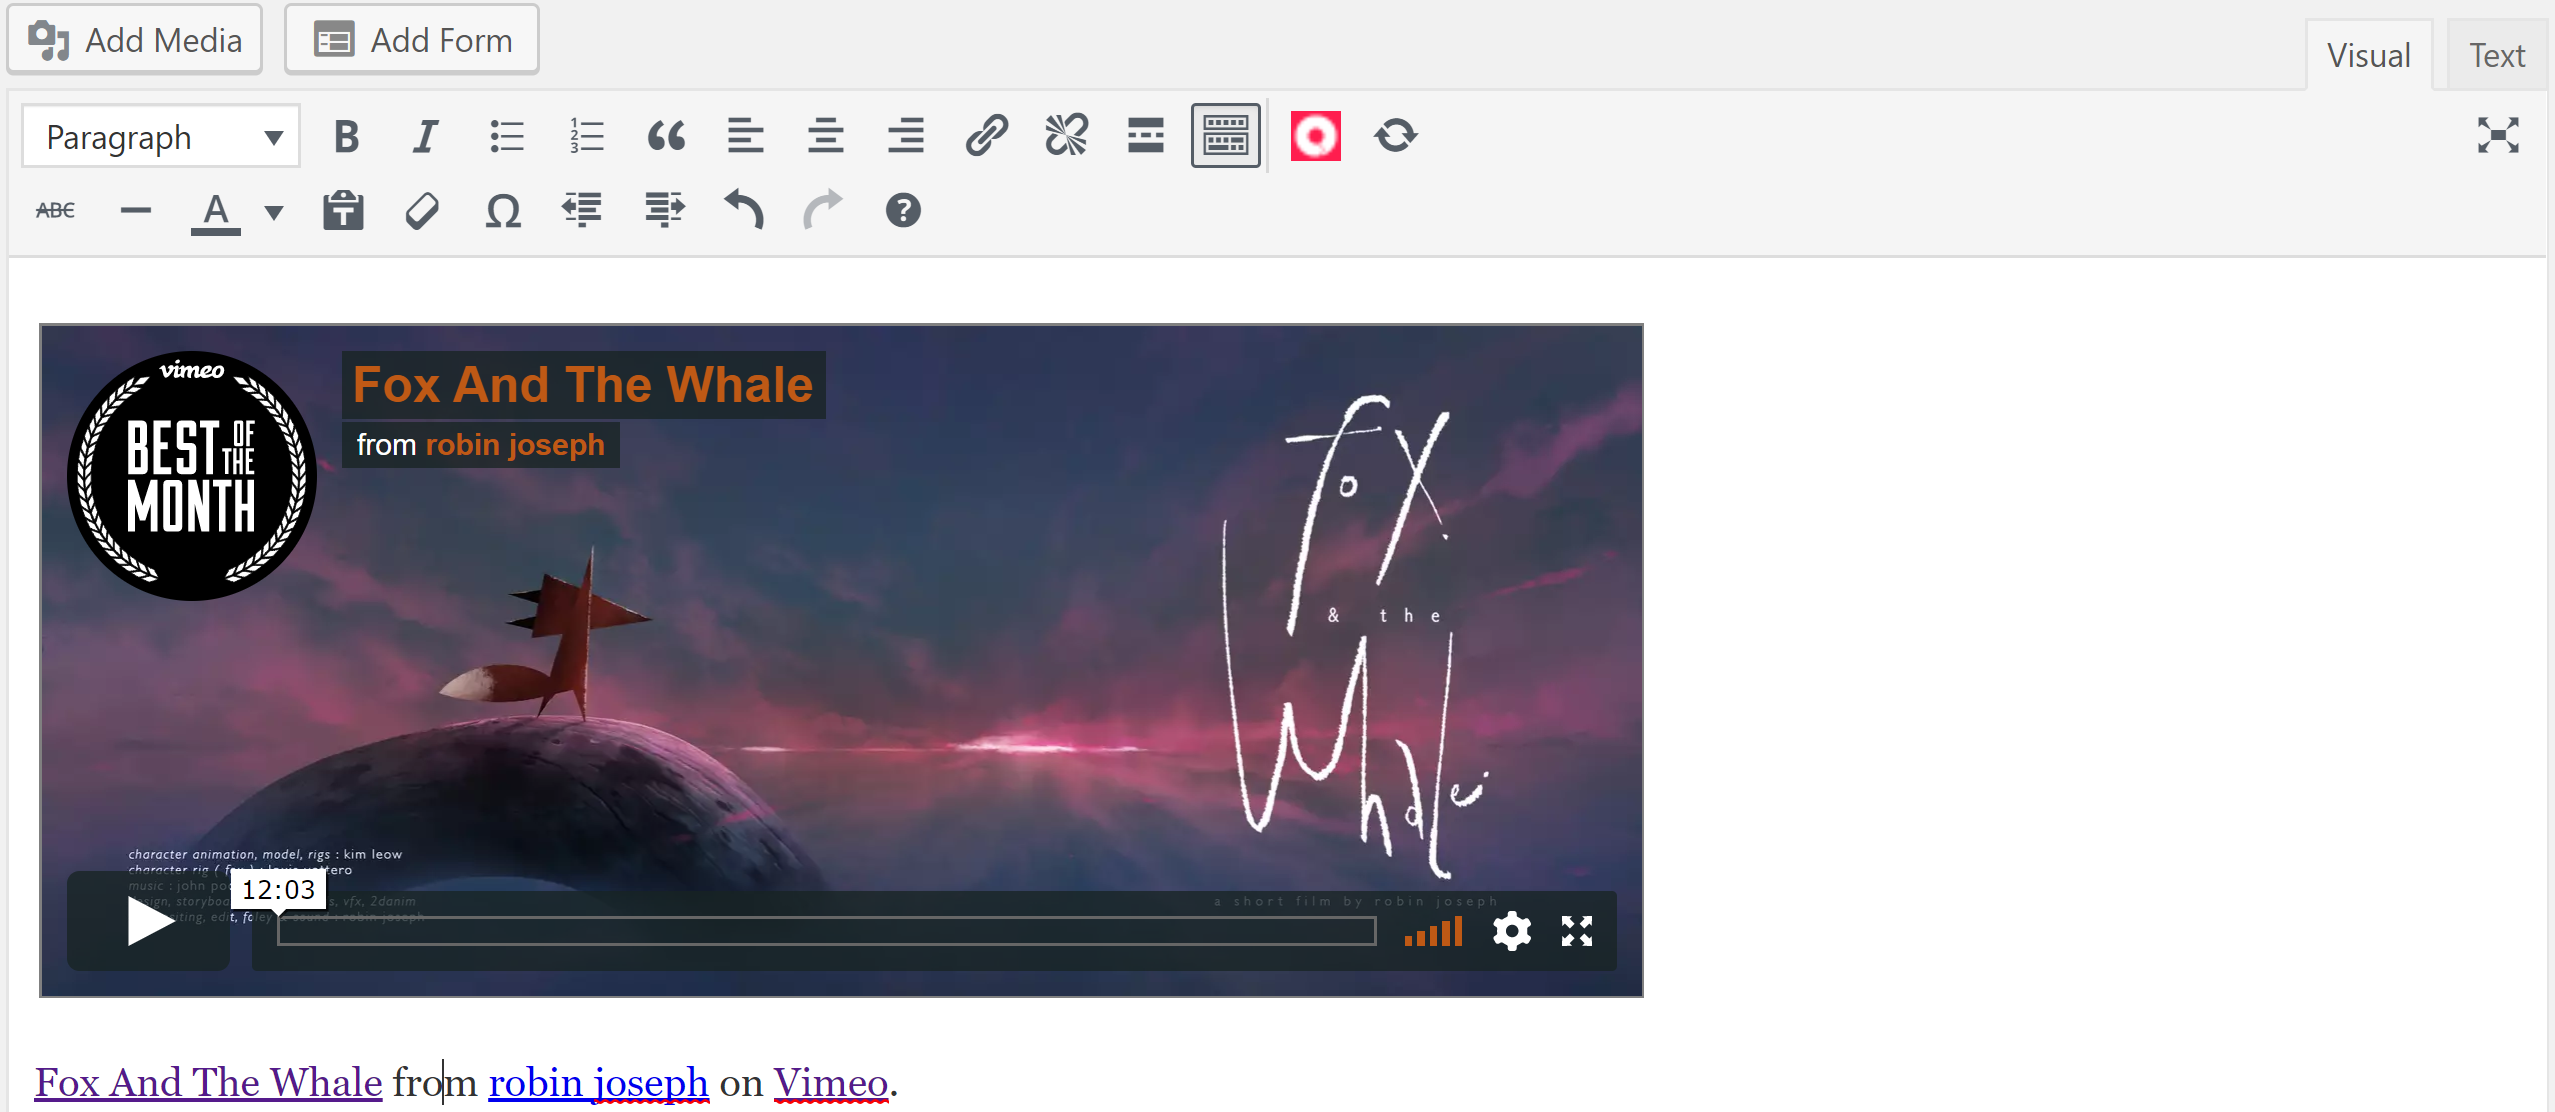
10. Select the "Visual" tab.

11. In the "Visual" tab, you should see the Vimeo video. You can adjust the placement of the video in the editor and add text or pictures around it.
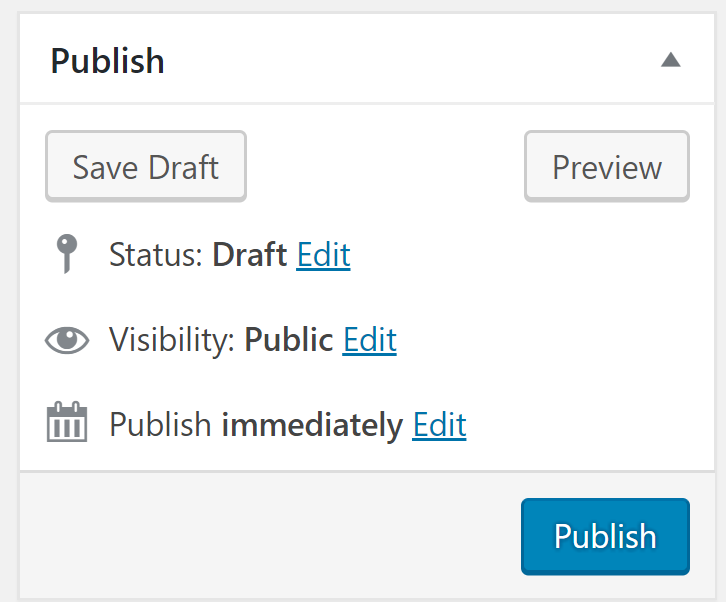
12. After you’ve added all necessary content, click “Save Draft” or "Publish" near the top right of the page.
13. Go to the page you added the video to on the frontend of the website to test your video.
If you have any questions about this how-to document or need help, please submit a support ticket or call 866-440-3158 ext. 2.